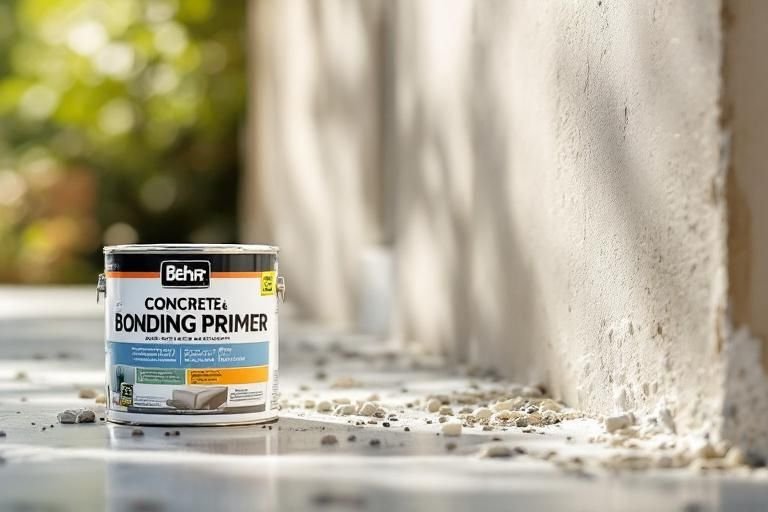
How to Apply Behr Concrete and Masonry Bonding Primer Effectively
Are you struggling with paint adhesion on your concrete or masonry surfaces? Applying a bonding primer is essential for achieving a smooth and lasting finish. In this article, we will delve into how to apply Behr concrete and masonry bonding primer effectively, ensuring your surfaces are well-prepared for paint. With over 15 years of experience in home improvement and surface treatment, I will guide you through the necessary steps, from preparation to application techniques. You’ll learn about the benefits of using a bonding primer, the materials you’ll need, and tips to avoid common pitfalls. Whether you’re a DIY enthusiast or a seasoned pro, this comprehensive guide will equip you with the knowledge to achieve the best results for your project.
Understanding Concrete and Masonry Bonding Primers
Concrete and masonry bonding primers are essential for ensuring proper adhesion of paint and coatings to surfaces like concrete, brick, and stucco. These primers create a strong bond by penetrating the porous surfaces, enhancing durability and preventing peeling or flaking. Understanding their composition and the importance of surface preparation is crucial for achieving the best results. When applied correctly, bonding primers can transform the look and longevity of your masonry projects, making them a worthwhile investment for any DIY enthusiast or professional.
What is a Bonding Primer?
A bonding primer is a type of primer designed specifically for porous surfaces such as concrete and masonry. Unlike regular primers, bonding primers contain special ingredients that enhance adhesion, ensuring that topcoats adhere effectively. They are particularly important for surfaces that are prone to moisture, as they help seal the surface and reduce the risk of damage over time.
Benefits of Using Bonding Primers
Using a bonding primer provides several benefits, including improved adhesion, enhanced durability, and increased resistance to mold and mildew. Additionally, a good bonding primer can prevent efflorescence, which is the formation of white powdery deposits on masonry surfaces caused by moisture. By applying a bonding primer, you ensure a smoother finish and extend the lifespan of your paint job.
Key Points:
- Bonding primers enhance adhesion to porous surfaces
- They prevent issues like peeling and moisture damage
Preparing Surfaces for Bonding Primer Application
Proper surface preparation is critical for the successful application of bonding primers. Clean, dry surfaces allow the primer to bond effectively, ensuring optimal performance. Before applying a bonding primer, it is essential to remove any dirt, grease, or old paint. Additionally, assessing the surface for any imperfections will help you determine if repairs are necessary before priming. Taking the time to prepare the surface properly will significantly improve the final outcome of your project.
Cleaning the Surface
Begin by thoroughly cleaning the surface to remove any contaminants such as dust, dirt, grease, or oils. Use a pressure washer or a stiff-bristle brush in combination with a mild detergent for tough stains. Rinse well and allow the surface to dry completely. Proper cleaning is essential to ensure that the bonding primer adheres effectively.
Assessing and Repairing Surface Imperfections
After cleaning, inspect the surface for cracks, holes, or other imperfections. Fill any gaps with appropriate patching materials, and sand down rough areas to create a smooth base for the primer. Repairing these imperfections not only aids in the bonding process but also provides a more aesthetically pleasing finish once the topcoat is applied.
Key Points:
- Thorough cleaning ensures effective bonding
- Repairing surface imperfections leads to a smoother finish
Preparing the Surface for Bonding Primer
Proper surface preparation is crucial for effective application of bonding primer on concrete and masonry. Start by cleaning the surface to remove any dirt, oil, or existing coatings. Use a pressure washer or a stiff brush along with a suitable cleaner for best results. After cleaning, allow the surface to dry completely before proceeding. Next, inspect for cracks or imperfections. Repair any damage with a suitable patching compound, ensuring a smooth, even surface. Finally, consider etching the concrete if it is particularly smooth, as this will enhance the primer’s adhesion. The right preparation sets the foundation for a successful application.
Cleaning the Surface
Begin by removing all contaminants from the surface. Use a pressure washer for large areas or a stiff brush with a cleaning solution for smaller sections. This step is essential as any residue can prevent proper adhesion of the primer.
Repairing Surface Imperfections
Inspect the concrete or masonry for cracks and chips. Use a patching compound to fill these imperfections, ensuring a smooth finish. This is important as any irregularities can compromise the bonding of the primer.
Key Points:
- Proper surface prep ensures primer adhesion
- Repairing cracks is essential for durability
💡 Always allow ample drying time after cleaning to ensure the surface is ready for primer application.
💡 Use a textured roller for better coverage on uneven surfaces.
Applying the Bonding Primer
Once the surface is prepared, it’s time to apply the bonding primer. Start by stirring the primer thoroughly to ensure an even consistency. Use a high-quality brush or roller for application, beginning in a corner and working your way across the surface. Apply in thin, even coats, avoiding puddling or pooling. Allow the first coat to dry according to the manufacturer’s recommendations before applying a second coat if necessary. Ensure that you are working in suitable weather conditions to avoid issues with drying time and adhesion. Proper application is key to achieving a strong bond.
Choosing the Right Application Tools
Selecting the right tools can significantly impact your application. A high-quality roller is ideal for large areas, while a brush is better for edges and corners. Ensure that the tools are clean and dry before use to prevent contamination of the primer.
Layering Technique
When applying the primer, use a technique that promotes even coverage. Apply thin layers and avoid overloading your brush or roller. This technique helps to prevent drips and runs, ensuring a uniform application that adheres effectively.
Key Points:
- Proper layering enhances adhesion
- Choose tools based on the area being covered
💡 Apply the primer in cooler parts of the day to avoid quick drying and improve workability.
💡 Use a paint grid to load your roller evenly for consistent application.
EXPERT TIPS Pro Advice
Always test a small area first
Testing a small area ensures compatibility and helps you gauge the final appearance before full application.
Check weather conditions
Avoid applying primer in extreme temperatures or humidity, as it can affect drying time and adhesion quality.
Use a primer specifically designed for the surface type
Different surfaces may require specific formulations; using the right type maximizes adhesion and durability.
Frequently Asked Questions
Conclusion
Applying a concrete and masonry bonding primer is essential for ensuring paint adhesion and durability on porous surfaces. Proper surface preparation, application techniques, and adherence to drying times are key components of a successful project. Following these steps will help achieve a professional finish.
🎯 Key Takeaways:
- Clean and dry surfaces before applying primer.
- Use appropriate application methods for even coverage.
- Allow adequate drying time for best results.
- Sanding after priming can enhance the final finish.
Expert Advice: Always follow specific guidelines for application and drying, as these can significantly impact the outcome. Taking the time to prepare correctly will pay off in a quality finish that lasts.
Now that you understand the application process, gather your materials and start your next masonry project with confidence!