How Many Coats of Primer on Metal: Essential Guide
Are you preparing to paint metal surfaces and wondering how many coats of primer on metal are necessary for optimal results? The right primer application is crucial for ensuring durability and a smooth finish, yet many DIYers and professionals alike often underestimate its importance. With over 15 years of experience in surface preparation and painting techniques, I’ve seen firsthand how the number of primer coats can impact the longevity and appearance of your project. In this article, we’ll explore the best practices for priming metal surfaces, including factors to consider, the benefits of multiple coats, and expert tips to achieve a flawless finish. By the end, you’ll have a clear understanding of how many coats you need and how to apply them effectively for stunning results.
Understanding the Purpose of Primer on Metal
Primer serves as a crucial preparatory layer for metal surfaces before painting. Its primary role is to ensure better adhesion of paint, enhance durability, and prevent rust or corrosion. For metal surfaces, the primer can also help seal porous materials and create a uniform surface for painting. Understanding the purpose of primer is essential to determine how many coats are necessary for optimal results.
Adhesion and Coverage
Primer improves paint adhesion by creating a bond between the metal and the paint. This bond is vital for ensuring the longevity of the finish. Typically, one coat of primer may suffice for smooth metals, while rougher surfaces may require two coats to ensure complete coverage and adhesion.
Corrosion Resistance
One of the significant benefits of using primer on metal is its ability to prevent rust and corrosion. A good-quality primer acts as a barrier against moisture and environmental elements. Depending on the exposure conditions, two coats might be necessary to provide comprehensive protection.
Key Points:
- Primer enhances paint adhesion and durability
- Multiple coats may be necessary for rough surfaces
Determining the Number of Coats of Primer Needed
The number of primer coats required on metal surfaces can vary based on several factors, including the type of metal, surface condition, and environmental exposure. Assessing these factors will help you decide how many coats are necessary for effective protection and finish quality.
Surface Condition
If the metal surface is clean, smooth, and free of rust, one coat of primer may be sufficient. However, if the surface is pitted or rusty, two or more coats may be required to fill in imperfections and ensure a smooth finish.
Type of Metal
Different metals react differently to primers. For instance, ferrous metals like steel may require more coats due to rust prevention needs, while non-ferrous metals like aluminum may require fewer. Always consider the metal type when deciding on primer coats.
Key Points:
- Surface condition affects number of coats needed
- Metal type influences primer application strategy
Understanding Primer on Metal Surfaces
When working with metal surfaces, the application of primer is crucial for ensuring proper adhesion and preventing corrosion. Typically, two coats of primer are recommended to achieve optimal coverage and protection. The first coat serves as a base, filling in any imperfections and promoting adhesion, while the second coat enhances durability and ensures a uniform finish. The type of metal and its condition can influence the number of coats needed, so it’s essential to assess the surface before starting the priming process.
Surface Preparation
Before applying primer, thoroughly clean the metal surface to remove any rust, grease, or contaminants. Use a wire brush or sandpaper to abrade the surface, promoting better adhesion. If the metal has existing paint, consider using a paint stripper or sandblasting for complete removal. Proper preparation ensures that the primer adheres effectively and enhances its protective qualities.
Choosing the Right Primer
Select a primer specifically designed for metal surfaces. Oil-based primers are typically recommended for their superior adhesion and rust-inhibiting properties. However, if you’re working with aluminum or galvanized metal, consider specialized primers designed for these materials, as they offer better bonding and prevent corrosion.
Key Points:
- Two coats of primer are generally recommended for optimal protection.
- Surface preparation is crucial for effective primer application.
💡 Always conduct a test patch before full application to ensure compatibility and adhesion.
💡 Consider the environmental conditions; high humidity may require additional drying time between coats.
💡 Use a sprayer for an even coat; this can significantly reduce the risk of runs and drips.
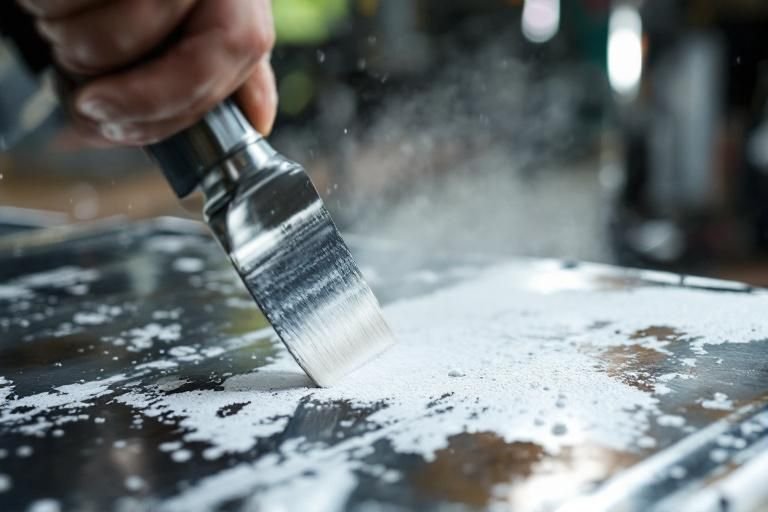
Application Techniques for Metal Primer
Applying primer correctly is essential for achieving a long-lasting finish on metal surfaces. The application method can significantly affect the primer’s effectiveness. Using a spray gun or airless sprayer offers a smooth, even coat, while brushes may leave streaks or uneven spots. Allow each coat to dry completely as per the manufacturer’s recommendations, usually between 1-4 hours, to ensure proper adhesion for subsequent layers. If necessary, sanding between coats can help achieve a smoother finish.
Layering and Drying Times
After applying the first coat, check for even coverage and any missed spots. Once the first layer is dry, lightly sand it to create a better surface for the second coat. This process promotes adhesion and ensures that the final finish looks smooth and professional. Be mindful of the drying time, as humidity and temperature can impact how quickly the primer sets.
Environmental Considerations
Temperature and humidity can greatly affect primer application and drying times. Ideally, work in a temperature range of 50°F to 90°F (10°C to 32°C) with low humidity for best results. If conditions are less than ideal, adjust your working pace and be prepared for longer drying times between coats to ensure a successful application.
Key Points:
- Application method impacts the primer’s effectiveness and finish quality.
- Consider environmental factors to ensure optimal application and drying.
💡 Always wear appropriate safety gear, including gloves and a mask, to protect from fumes.
💡 Maintain a consistent distance from the surface when spraying to ensure even coverage.
💡 Apply in thin coats; this prevents runs and allows for better control over the finish.
EXPERT TIPS Pro Advice
Test a small area first
Testing a small area allows you to check for adhesion and compatibility, ensuring that the primer will bond effectively with the metal.
Use multiple thin coats instead of one thick coat
Thin coats dry faster and adhere better, reducing the risk of runs and ensuring a more even finish.
Keep the work area well-ventilated
Good ventilation helps in faster drying and minimizes exposure to harmful fumes during the priming process.
Follow manufacturer instructions closely
Each primer may have specific application techniques and drying times; adhering to these guidelines ensures better results.
Frequently Asked Questions
Conclusion
Applying primer on metal is essential for protecting against rust and ensuring paint adhesion. Typically, two coats are recommended, with proper drying times and sanding before application. Choosing the right primer and following these steps will lead to a long-lasting finish.
🎯 Key Takeaways:
- Use two coats of primer for optimal coverage.
- Primer prevents rust and improves paint adhesion.
- Sand metal surfaces for better primer bonding.
- Check drying times before applying additional coats.
- Always apply a topcoat for enhanced durability.
Expert Advice: Take your time with the priming process, as it significantly affects the longevity and appearance of your paint job. Each step, from sanding to applying the topcoat, contributes to a professional finish.
Consider your project needs and start prepping your metal surfaces today for a successful painting experience.