What to Paint on a Pumpkin with Acrylic Paint: Creative Ideas
Are you looking for fun and creative ideas on what to paint on a pumpkin with acrylic paint this fall? Painting pumpkins is a delightful way to express your artistic side while celebrating the season. Whether you are preparing for Halloween, Thanksgiving, or simply want to add a festive touch to your home, the possibilities are endless. As an expert in seasonal crafts, I will guide you through a variety of inspiring designs, techniques, and tips to help you create standout pumpkin art. From simple patterns to intricate scenes, this article will provide you with all the information you need to bring your pumpkin painting visions to life.
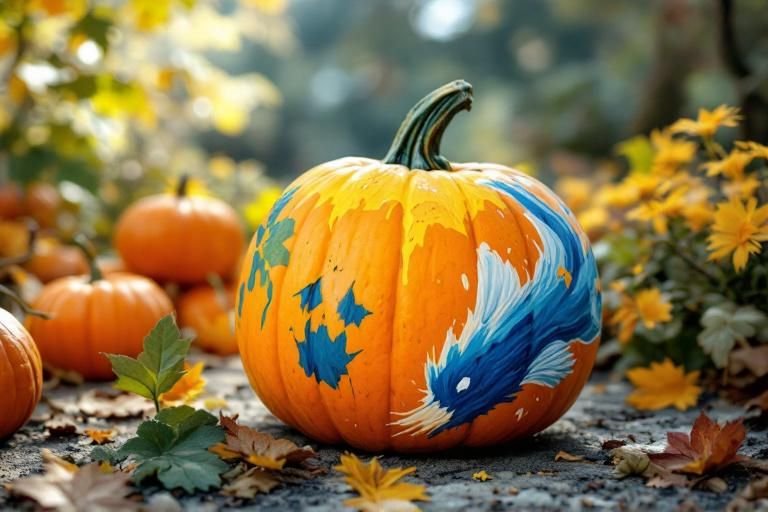
Choosing the Right Design for Your Pumpkin
Selecting a design is one of the most crucial steps when painting a pumpkin with acrylic paint. Consider the occasion, your skill level, and the size of the pumpkin. Simple designs like polka dots or stripes work well for beginners, while more intricate patterns, such as animals or landscapes, are suited for those with more experience. Seasonal themes like Halloween or fall motifs can also inspire your choice. Sketch your ideas on paper first to visualize the final look and ensure the design fits well on the pumpkin’s surface.
Seasonal Themes
Seasonal themes can greatly influence your design. For Halloween, consider spooky motifs like ghosts, bats, or jack-o’-lantern faces. For autumn, warm colors and leaf patterns evoke a cozy feel. Tailoring your design to the season not only enhances the pumpkin’s appeal but also complements the overall decor of the environment.
Skill Level Considerations
Your comfort level with painting will guide your design choice. Beginners might opt for block colors or simple shapes, while advanced artists can tackle detailed illustrations. It’s important to be realistic about your capabilities to avoid frustration and ensure a fun painting experience.
Key Points:
- Seasonal themes can enhance your pumpkin’s appeal.
- Choose a design that matches your skill level for a satisfying outcome.
💡 Consider your audience and the occasion to choose a meaningful design.
💡 Sketch out your design before painting to ensure it fits the pumpkin’s shape.
Preparing Your Pumpkin for Painting
Before diving into the painting process, proper preparation of the pumpkin is essential. Start by cleaning the pumpkin with soap and water to remove any dirt or residue. This ensures better adhesion of acrylic paint. After cleaning, dry the pumpkin thoroughly and consider applying a primer. This step can help the paint go on smoother and make the colors more vibrant. If you’re working with a carved pumpkin, be mindful of the edges to avoid any peeling or chipping of paint.
Cleaning and Drying
Cleaning the pumpkin not only enhances its appearance but also aids in paint adhesion. Use a mild soap solution and a soft cloth. After washing, make sure to dry the pumpkin completely, as moisture can prevent the paint from sticking properly and cause it to peel off later.
Applying Primer
Applying a primer can significantly improve the final look of your painted pumpkin. A layer of primer creates a smooth base, allowing the acrylic paint to adhere better and appear more vibrant. You can use a white or clear primer, depending on the color scheme of your design.
Key Points:
- Proper preparation helps achieve a professional-looking finish.
- Cleaning and priming are crucial steps for successful painting.
💡 Always clean the pumpkin thoroughly to ensure paint adhesion.
💡 Consider using a primer to enhance the vibrancy of your paint.
Choosing Your Pumpkin Design
Selecting the right design is crucial for creating an eye-catching pumpkin. Consider your audience and the message you want to convey. Popular themes include traditional Halloween motifs like ghosts and witches, or more whimsical options like animals or nature scenes. Additionally, think about the size and shape of your pumpkin, as this will influence your design. For larger pumpkins, intricate designs can be effective, while smaller pumpkins may benefit from simpler patterns.
Seasonal and Themed Designs
Incorporate seasonal elements into your design. For Halloween, spooky faces or classic symbols like bats and cobwebs work well. For Thanksgiving, consider painting autumn leaves or turkeys. Incorporating these themes can enhance the festive atmosphere and make your pumpkin a conversation starter.
Personalization and Customization
Make your pumpkin unique by adding personal touches. Family names, inspirational quotes, or favorite characters can all be painted onto your pumpkin. This personalization not only showcases your creativity but also adds sentimental value, making the pumpkin more than just a decoration.
Key Points:
- Choose designs that resonate with your audience and the occasion.
- Personalized pumpkins enhance emotional connection and creativity.
💡 Sketch your design on paper first to visualize it, which helps in making adjustments before painting.
💡 Use a reference image to maintain proportions and details in your design, ensuring a polished final look.
Techniques for Painting Pumpkins with Acrylics
Acrylic paint is versatile and works well for pumpkin decorating. Start with a clean, dry surface and consider applying a base coat to ensure vibrant colors. Layering is key; begin with lighter colors and build up to darker shades for depth. Additionally, use a variety of brushes and sponges to achieve different textures and finishes, from smooth to spongy effects. Seal your painted pumpkin with a clear acrylic sealer to protect your artwork from moisture and fading.
Surface Preparation and Base Coating
Before you start painting, clean the pumpkin thoroughly to remove any dirt or wax. Applying a base coat of white or a light color not only makes colors pop but also provides a smoother surface for painting. This step is especially important when using bright colors.
Layering and Detailing Techniques
Layering colors can create depth in your design. After applying the base coat, add details using smaller brushes for precision. Techniques like dry brushing or sponging can enhance textures, making your design more visually interesting. Don’t rush—let each layer dry before adding the next to prevent smudging.
Key Points:
- Proper surface preparation enhances paint adherence and vibrancy.
- Layering and textural techniques elevate the quality of your painted pumpkin.
💡 Test paint colors on a small area of the pumpkin first to see how they appear once dry.
💡 Consider using stencils for intricate designs, especially if you’re new to painting.
EXPERT TIPS Pro Advice
Choose the right brush for your design.
Different brushes create different effects; flat brushes work for broad strokes, while fine-tip brushes are essential for details.
Keep a wet palette to extend your paint’s working time.
A wet palette prevents acrylics from drying out too quickly, allowing you to work longer on your design without interruptions.
Experiment with mixing colors.
Blending colors can create unique shades, giving your pumpkin a personalized touch that stands out.
Plan for outdoor exposure if displayed outside.
If your pumpkin will be outside, consider using outdoor acrylics or sealing it properly to withstand the elements.
Frequently Asked Questions
Conclusion
Painting pumpkins with acrylic paint is a fun and creative way to celebrate the season. From easy designs to proper preparation, following these tips will help you achieve beautiful and lasting artwork. Experiment with colors and techniques to make your pumpkins truly unique.
🎯 Key Takeaways:
- Choose simple designs for easy execution.
- Prepare your pumpkin by cleaning and priming.
- Acrylic paint offers vibrant colors and quick drying.
- Mixing colors enhances creativity.
- Sealing your painted pumpkin extends its durability.
Expert Advice: Don’t hesitate to express your creativity! Use this opportunity to explore different designs and color combinations. Remember, the joy of pumpkin painting lies in the process as much as the final product.
Gather your supplies, unleash your creativity, and start painting your pumpkin today!