
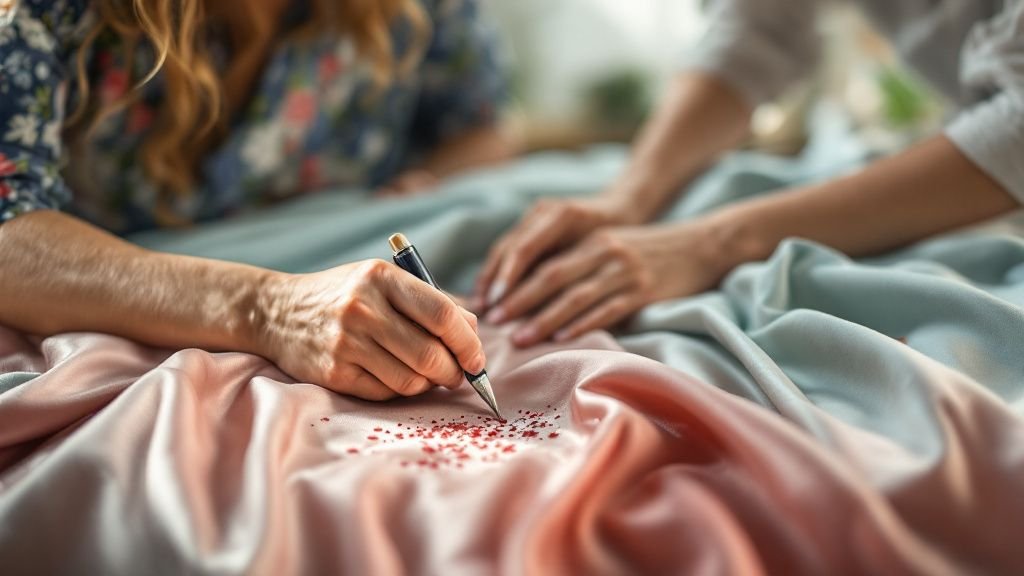
How to paint satin fabric without ruining it: Expert tips
Can you paint satin and still keep its smooth sheen and graceful drape? Yes, but the right approach depends on what the fabric is made from and how the paint is applied. If you’re wondering how to paint satin fabric without ruining it, start by remembering that satin describes a weave, not a fiber. Satin may be silk, polyester, acetate, or another material, and each can react differently to moisture, friction, and heat.
A careful process begins with checking the care instructions and testing a hidden area. From there, use a clean, stable work surface, apply thin, even layers, and let each layer dry fully before adding more. Too much paint or aggressive handling can leave satin stiff, patchy, or dull. This guide explains how to identify key fabric considerations, prepare and test satin, apply paint while minimizing damage, and finish the work carefully. You’ll also learn which common mistakes to avoid and why any heat-setting step should follow the guidance for both the fabric and the paint medium.
Understand the Satin Before You Paint
The safest way to approach how to paint satin fabric without ruining it is to identify the fabric and test your method before treating the whole piece. Satin describes a weave, not a fiber: it may be silk, polyester, acetate, or a blend. These materials respond differently to moisture, heat, and paint. A delicate or valuable garment may be better left to a textile professional, especially if its care label says dry-clean only. Paint can also change satin’s characteristic smooth drape and reflective surface, even when applied carefully. Begin with a hidden-area test using the same preparation and paint you intend to use. Let it dry completely, then check for color change, stiffness, cracking, or damage to the sheen. If the test looks or feels unacceptable, stop rather than scaling up. Plan for a light, flexible design: thick or heavily layered paint is more likely to make the fabric rigid and visibly uneven.
Check the Fiber and Care Instructions
Read the care label and, if possible, confirm the fiber content before applying anything. Silk and acetate can be sensitive to water or heat; polyester may resist some colorants. Since satin is a weave rather than a fiber type, its glossy face alone cannot tell you how it will react. Avoid assuming that a method suitable for one satin item is safe for another. For a valuable or dry-clean-only piece, seek professional advice before testing.
Test an Inconspicuous Area First
Choose a hidden spot, such as an inside seam allowance, and test the complete process there: preparation, paint, drying, and any intended curing step. Assess the result only after it is fully dry. Look for discoloration, water marks, loss of sheen, stiffness, cracking, or paint transfer when gently rubbed. A small test cannot guarantee identical results across the garment, but it can reveal obvious incompatibilities before they affect a visible area.
Key Points:
- Satin names a weave, so identify the fiber and follow the care label.
- Test the entire process in a hidden area and inspect after complete drying.
💡 Photograph the hidden-area test in consistent light before and after drying; satin’s changing reflections can make subtle shifts in sheen or color easier to miss.
Prepare and Apply Paint with a Light Touch
Once a test is acceptable, prepare the satin so it lies flat without stretching or flattening its surface. Work on a clean, dry area; avoid aggressive scrubbing, which can disturb delicate fibers or the sheen. Place a smooth, clean barrier beneath the layer being painted so paint does not seep through to the reverse side. Use paint intended for flexible fabric, or a compatible textile medium with an appropriate paint, and follow its directions. Apply several thin layers rather than one heavy coat, allowing each layer to dry as directed. A soft brush or sponge can reduce drag, but test the tool first because friction can catch or distort the weave. Do not pull the fabric taut while painting, since the design may distort when the satin relaxes. Allow the work to dry fully before moving or wearing it, and use heat only if the material and paint instructions explicitly permit it. Some stiffness may remain; keeping the painted area small helps preserve movement.
Set Up the Fabric Without Stretching It
Lay the fabric on a clean, stable surface and smooth it gently rather than pulling it tight. Insert a smooth barrier under the section being painted to prevent bleed-through. Keep surrounding fabric clear of wet paint, and avoid pins or rough supports that could snag the weave. If the item has folds or seams, position it so the painted area remains flat and accessible without forcing the satin out of its natural shape.
Build Color in Thin Layers
Choose a flexible fabric-compatible paint system and follow its instructions for application and drying. Apply a thin layer with minimal pressure, then let it dry before deciding whether another layer is needed. Thick coats can obscure the satin’s reflective surface, stiffen the fabric, and crack as it moves. Avoid brushing repeatedly over a wet area; that can disturb the finish and create uneven coverage. Confirm that any heat-setting step is safe for both the fiber and the paint.
Key Points:
- Use a barrier and support the fabric without stretching or abrading it.
- Thin, fully dried layers are less likely to stiffen or crack than a heavy coat.
💡 Keep painted coverage as limited as the design allows; less coated fabric generally means less change to the satin’s drape and movement.
Prepare Satin and Test Compatibility Before Painting
Satin describes a weave, not a fiber, so the fabric may be polyester, silk, acetate, or a blend. That distinction matters: fibers react differently to moisture, heat, and paint binders. Check the care label and, if possible, test a hidden seam or matching scrap before treating the visible area. Wash only if the care instructions allow it, using a gentle method to remove finishes, oils, or sizing that can prevent even adhesion. Let the fabric dry completely, then smooth it without stretching or pressing in creases. Support the satin on a flat, protected surface and place a removable barrier beneath the layer so paint cannot seep through. Avoid pulling the cloth taut; tension can distort the weave and leave the design warped when released. Start with a small test that includes the intended paint mixture and drying method. Assess the result after it is fully dry for stiffness, color change, bleed-through, and cracking when gently flexed. If the test fails, change the technique before proceeding.
Identify the Fiber and Check the Care Limits
Look for fiber information on the care label rather than assuming all satin behaves alike. Polyester satin is often less absorbent than silk satin, while delicate fibers may be damaged by washing or heat. If the label is missing, treat the fabric conservatively and test a hidden area. Do not use a heat-setting method unless the fiber’s care limits and the paint medium’s instructions both permit it; the lower safe temperature takes priority.
Run a Small, Complete Paint Test
Test the full process—not just the wet color—on a scrap or inconspicuous section. Apply the same thin layers you plan to use, let them dry for the stated time, and check the reverse side for seepage. Once cured, bend the test gently and rub it with a clean cloth. Reject or adjust a method that leaves the satin board-stiff, transfers color, cracks, or develops a visibly darker ring around the painted area.
Key Points:
- Satin is a weave, so identify the fiber before choosing a painting or curing method.
- A fully dried and flex-tested sample can reveal stiffness, bleeding, and cracking before they affect the finished piece.
💡 Keep a labeled test swatch with notes on dilution, drying time, and heat exposure; satin varies by fiber and finish, so a repeatable test is more reliable than guessing.
Apply Thin Layers and Cure the Design Carefully
The safest approach is controlled, minimal application: excess liquid can spread along the smooth weave, seep through, or leave a stiff patch. Secure the fabric so it lies flat without stretching, and use a light touch with a soft brush, sponge, or fine applicator suited to the design. Work from a small amount of paint and build opacity gradually rather than saturating the fibers in one pass. Keep each layer thin and allow it to dry before adding another; avoid repeatedly brushing over a tacky area, which can lift the layer or create streaks. After painting, let the fabric cure undisturbed for the period specified for the medium. Heat-setting is not universally safe or necessary: follow the paint instructions only when they are compatible with the fabric’s care limits, and use a barrier to prevent transfer. Once cured, handle gently and follow conservative washing guidance. A painted section may remain less flexible and more vulnerable to friction than unpainted satin.
Build Color Without Flooding the Weave
Load the applicator sparingly and remove excess before touching the satin. Apply paint in short, light strokes, keeping the fabric supported and working outward from the center of a design when practical. Let a layer dry before judging its color; wet paint often looks darker and more opaque. If more coverage is needed, add another thin layer instead of pressing harder or diluting heavily, which can encourage spreading and bleed-through.
Dry, Cure, and Maintain Without Distortion
Dry the piece flat in a clean area, away from dust and direct heat, and do not fold or hang it while the paint is damp. Follow the medium’s curing directions, but do not exceed the fabric’s heat tolerance. If washing is appropriate, turn the item inside out, use a gentle cycle or hand wash, and avoid wringing or scrubbing the painted section. Air-dry flat when possible to reduce stress on both satin and paint.
Key Points:
- Several thin coats are generally safer and more flexible than one heavy, wet coat.
- Curing and cleaning must respect both the paint medium’s directions and the satin fiber’s care limits.
💡 Use a barrier under every painted layer, even when applying paint sparingly; satin can allow moisture to travel through before the surface looks saturated.
💡 Do not judge coverage while the paint is wet. Waiting for a layer to dry helps prevent unnecessary extra coats that can make the fabric rigid.
💡 Keep painted areas away from seams, folds, and high-friction zones when you can; those locations flex or rub more and are more likely to crack or wear.
EXPERT TIPS
Pro Advice
Test for finish or sizing residue
A factory finish can cause paint to bead or adhere unevenly. Compare a cleaned test area with an untreated one; if cleaning improves the result, use the same permitted preparation on the full piece.
Control the fabric without stretching it
Taut satin can shift back into its original shape after painting, distorting the design. Support it on a flat surface and secure only the edges lightly so the weave stays relaxed.
Keep a record of successful conditions
Note the fiber, paint consistency, layer thickness, drying intervals, and curing method. These details make it easier to reproduce a successful test and diagnose problems on a larger project.
Treat heat-setting as a compatibility check, not a default step
Some fabric fibers can scorch, melt, or lose their finish under heat. Confirm that both the care label and the paint instructions allow the same method before applying heat to the finished design.
Frequently Asked Questions
Conclusion
Painting satin successfully depends on working with its smooth surface rather than against it. First identify the fabric fiber and check its care label, then clean and dry the material and test your paint on a hidden area. Apply a flexible textile paint in light, thin layers, keeping the fabric supported and avoiding excess moisture. Let each layer dry fully, and heat-set or wash the finished piece only when the relevant instructions allow it. These precautions help reduce bleeding, stiffness, cracking, and heat damage while giving the paint the best chance of lasting.
🎯 Key Takeaways:
- Check the fiber and care label before choosing a painting or setting method.
- Test paint and technique on an inconspicuous area first.
- Apply thin layers with light strokes to limit stiffness and bleeding.
- Let the paint dry and cure fully before wearing, folding, or washing.
- Use heat or wash the fabric only when both sets of instructions permit it.
Expert Advice: Treat satin as a delicate, fiber-specific fabric: use the gentlest method that achieves your design, and do not assume all satin can tolerate the same paint, water, or heat.
Before painting your full piece, try a small test on a hidden section and check how it looks and feels after drying.